
Connect your WooCommerce shop to StartFill
Link WooCommerce to our warehouse with FFN Connect in about 15 minutes — with our free connector plugin or fully self-service, nothing changes for your customers, and your WordPress password is never shared.
One connection, everything in sync
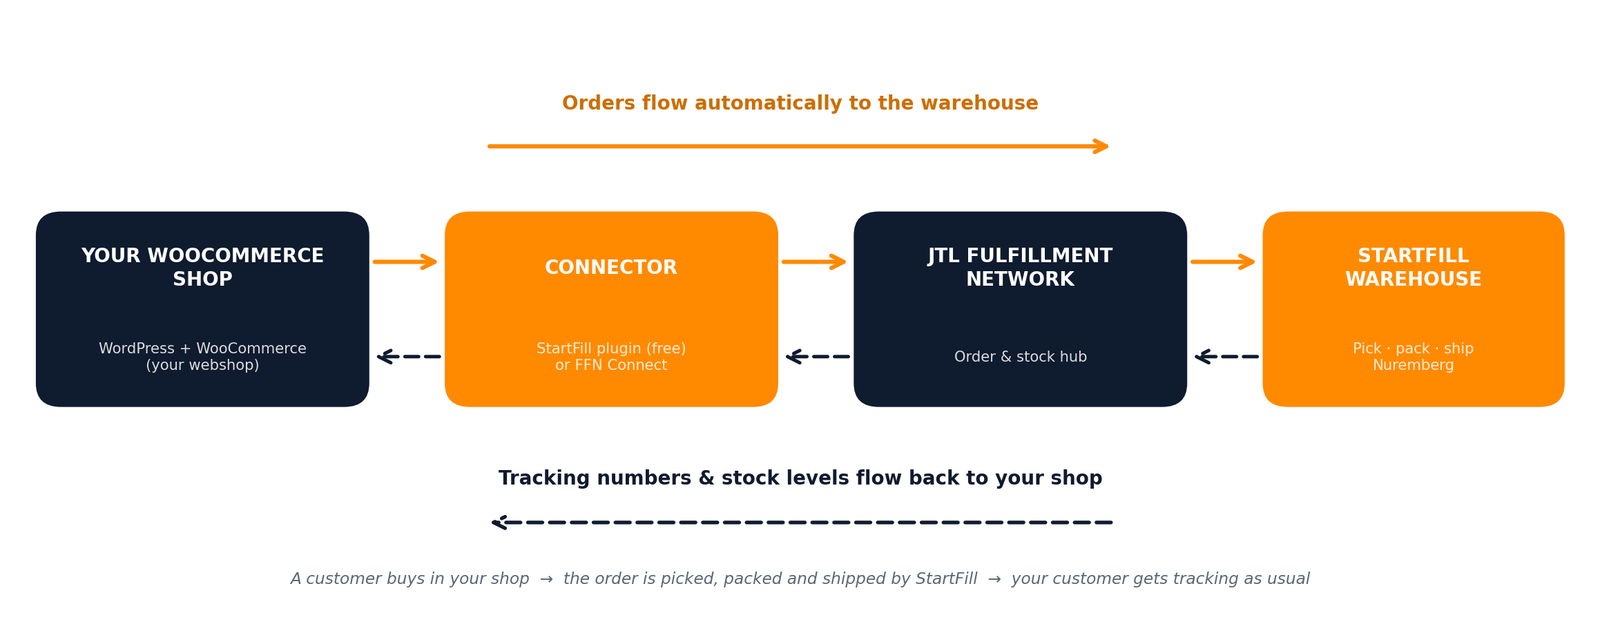
FFN Connect — the official middleware of the JTL Fulfillment Network (FFN) — sits between your WooCommerce shop and the StartFill warehouse. Orders travel one way; tracking numbers and stock levels travel back.
Two ways to connect — which is right for you?
StartFill Connector plugin
Free — provided by StartFill
- One small plugin, installed in a minute
- We configure it together with you
- Orders push to the warehouse the moment they are paid
- Built and maintained by StartFill
- Best for merchants selling (mainly) via their own shop
FFN Connect
14-day free trial · then from €10/month incl. 50 orders
- Fully self-service in your browser (~15 minutes)
- No plugin — uses WooCommerce's built-in REST API
- Add Amazon, eBay, OTTO & more in the same account
- Maintained by the JTL Group
- Best for multi-channel sellers
Both routes deliver the same result — and you can switch later at any time.
The StartFill Connector plugin
A small WordPress plugin, built and maintained by StartFill, that sends each new WooCommerce order directly to the JTL Fulfillment Network the moment it is paid — free for StartFill customers. You receive the .zip and your personal access token from your StartFill contact; the one-time setup is a guided process we do with you.
Install the plugin
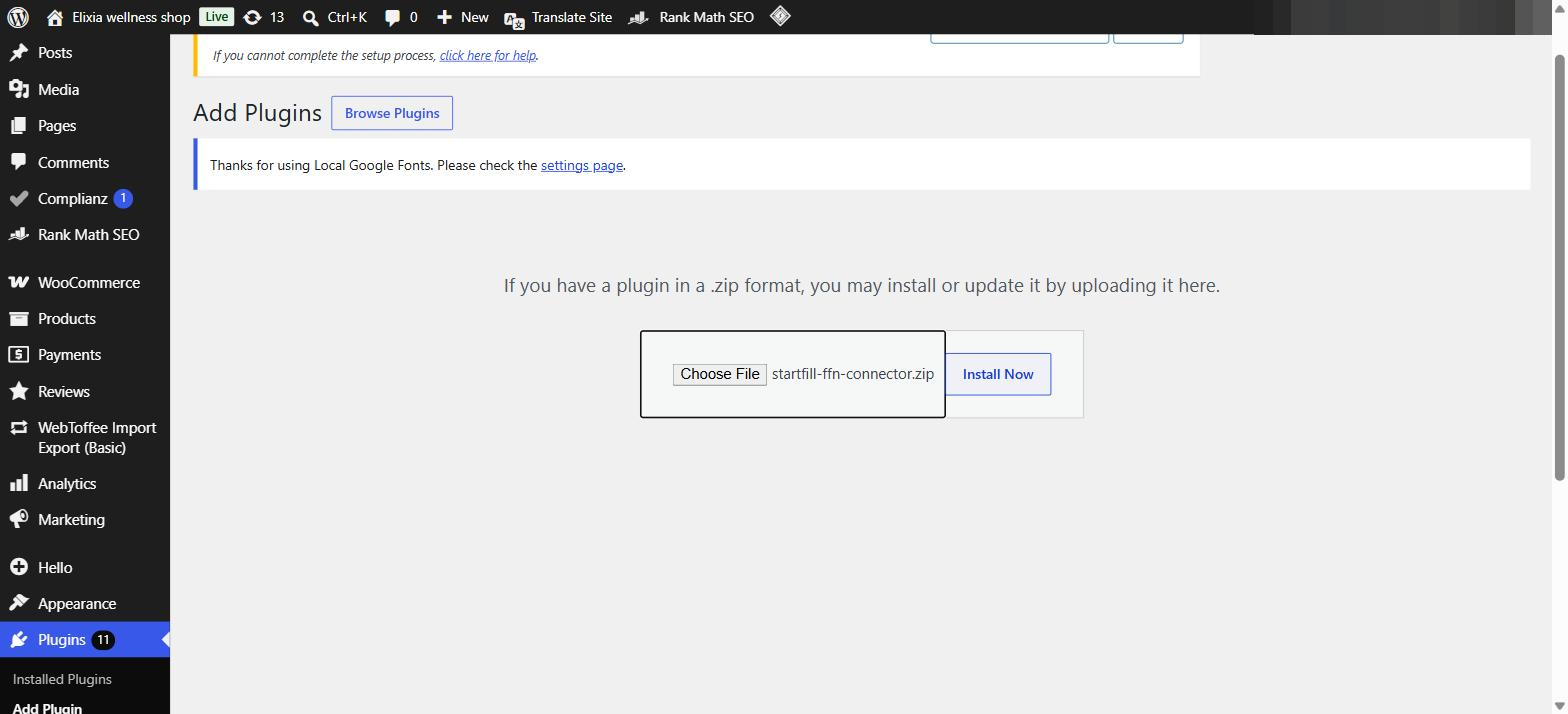
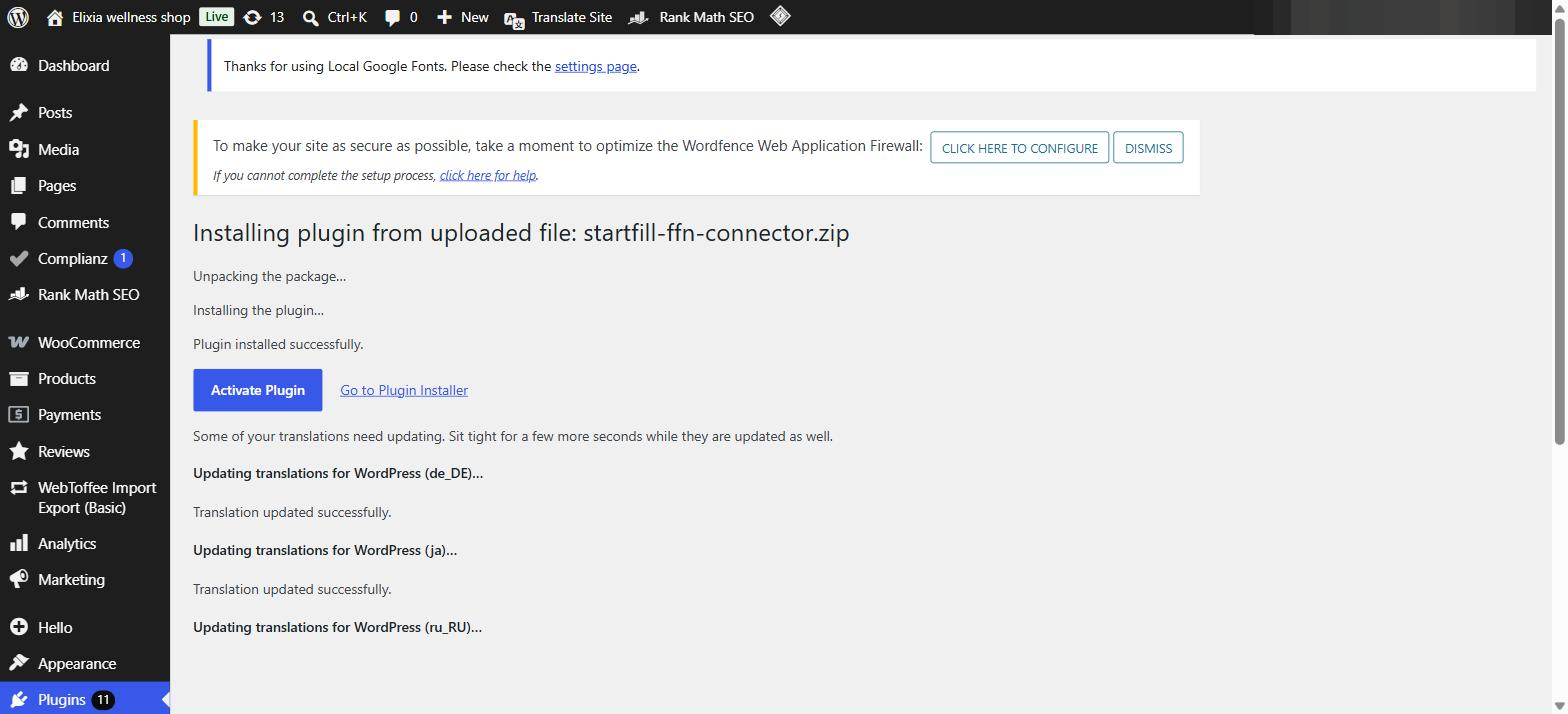
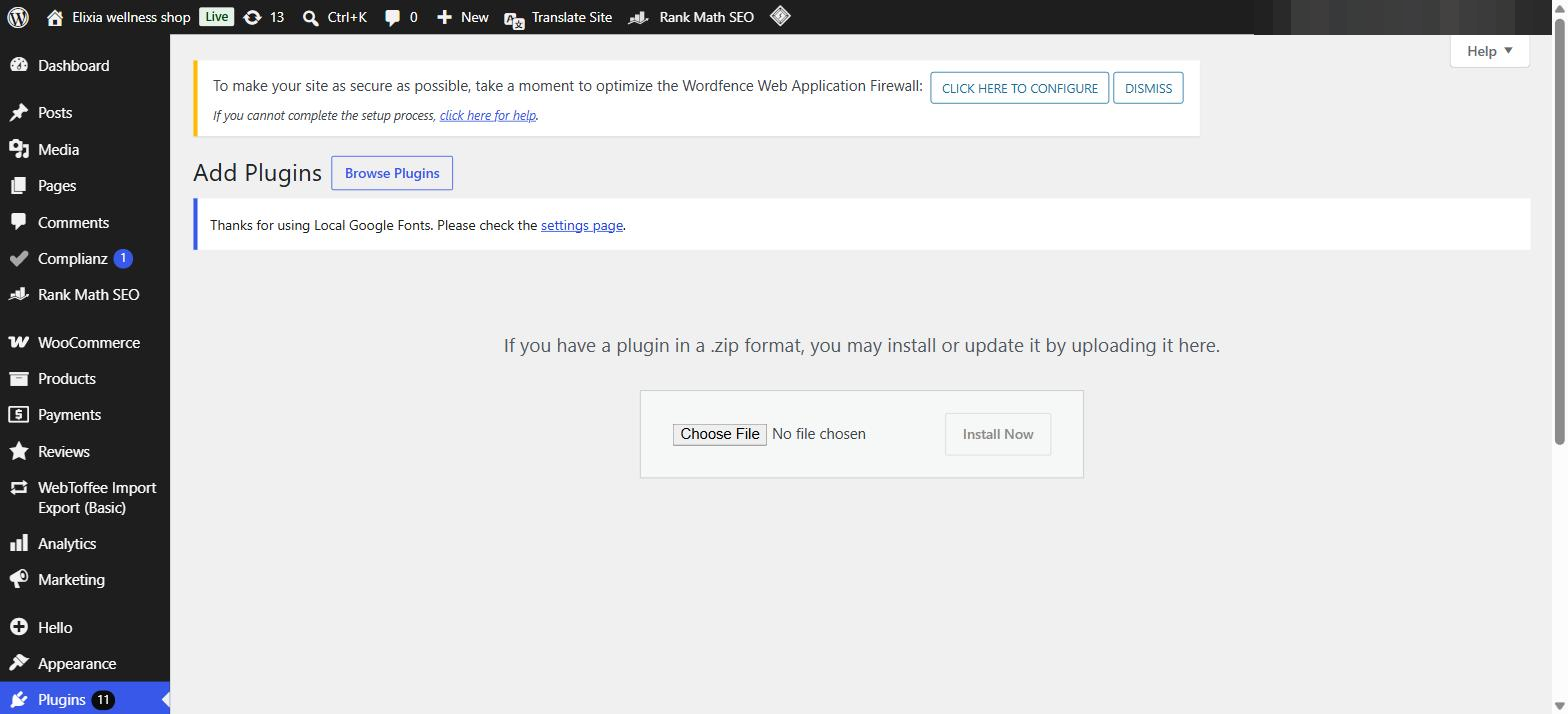
In your WordPress admin, go to Plugins → Add New Plugin → Upload Plugin, choose the startfill-ffn-connector.zip you received from us and click Install Now, then Activate Plugin.
Enter your access token
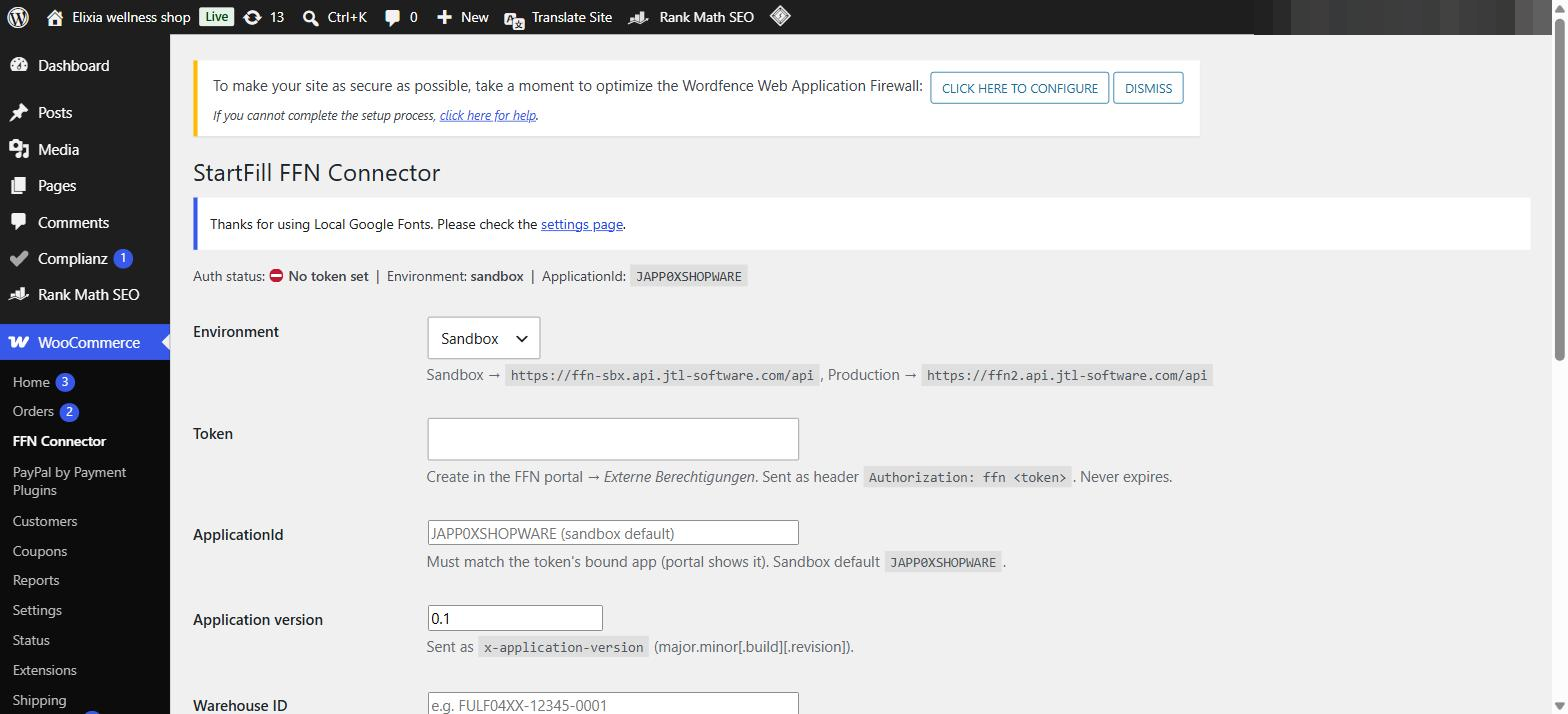
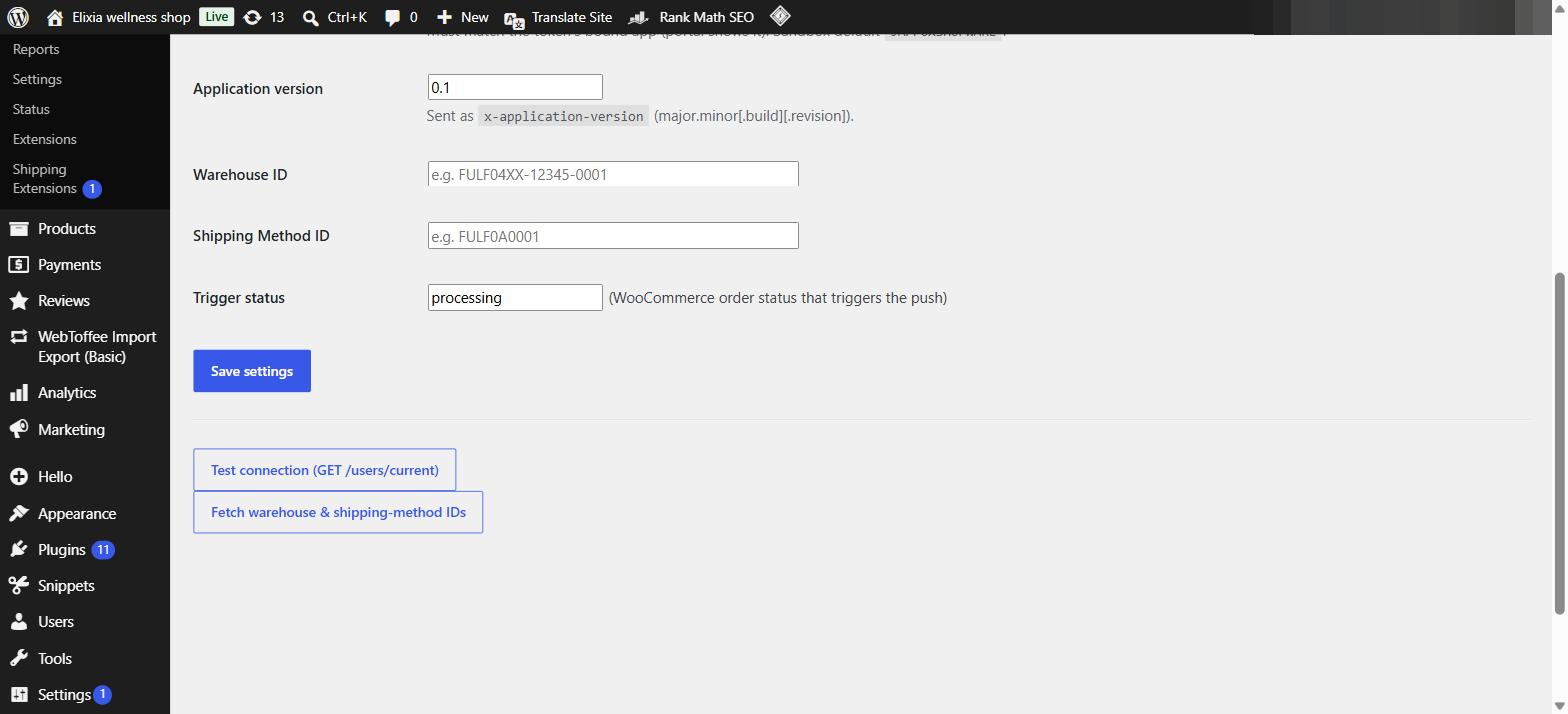
After activation you find the plugin under WooCommerce → FFN Connector. Paste the access token you received from StartFill (created in the FFN portal under Externe Berechtigungen — we do this step together with you). It can be revoked in the portal at any time.
Test and go
Click “Test connection” → Connected. Then “Fetch warehouse & shipping-method IDs” fills the remaining fields automatically. Save, place a test order, and every paid order is pushed to the warehouse from then on.
FFN Connect: five steps to your connection
The FFN Connect interface is currently German-first — the screenshots below show the German labels with English explanations. All account details shown are examples.
Create your FFN Connect account
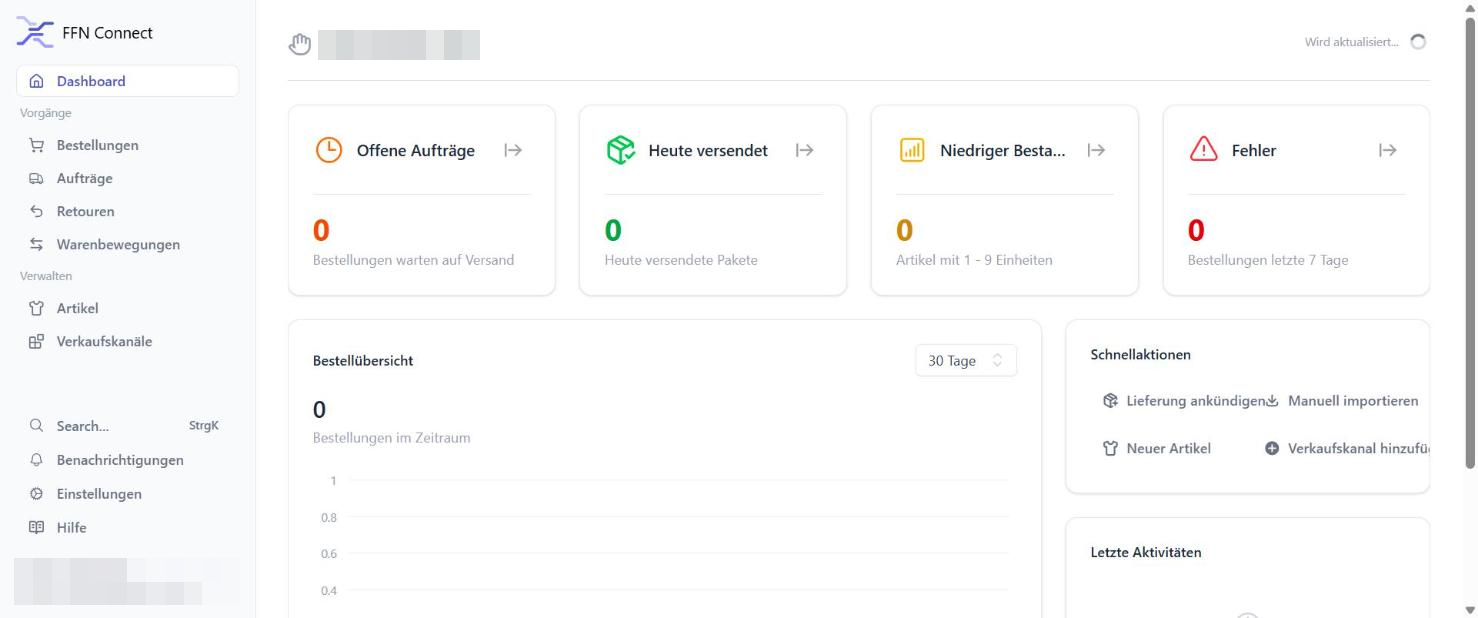
Open ffn-connect.de/register and create an account with your e-mail address and a password (or use Login mit JTL Account if you already have one). After confirming your e-mail you land on your personal dashboard — this is where your orders, shipments and stock will appear later.
Start the free 14-day trial
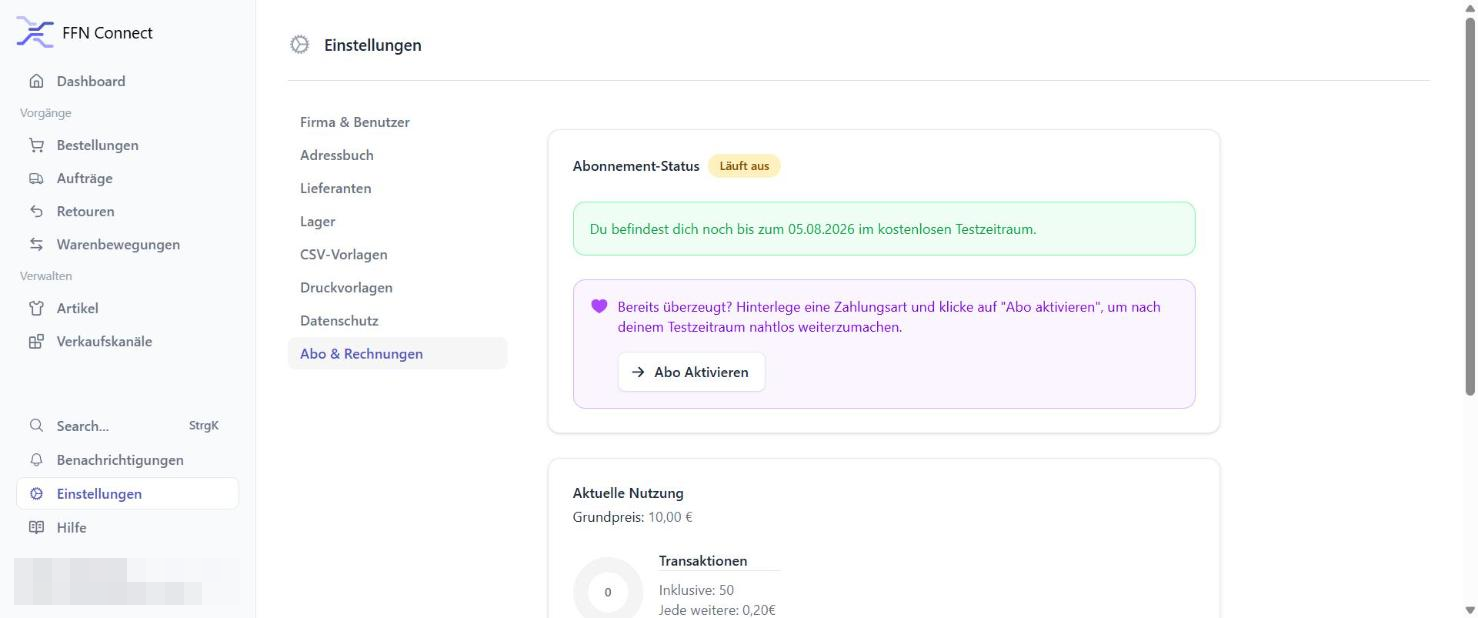
Go to Einstellungen → Abo & Rechnungen and click “Testzeitraum starten” (Start trial period). No payment details are required.
Add WooCommerce as a sales channel
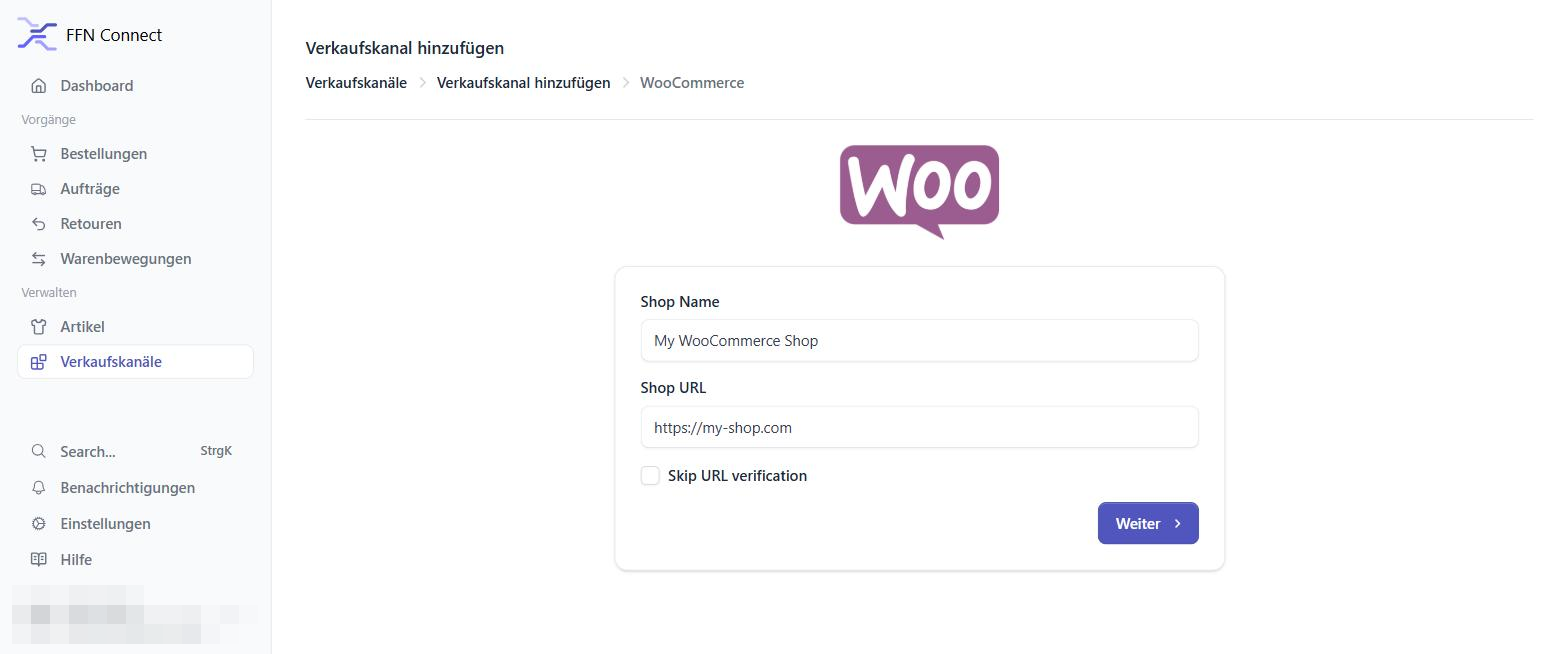
Open Verkaufskanäle, click “+ Verkaufskanal hinzufügen” and choose WooCommerce in the Shopsysteme column. Give the channel a name, enter your shop address including https://, and click Weiter (Next).
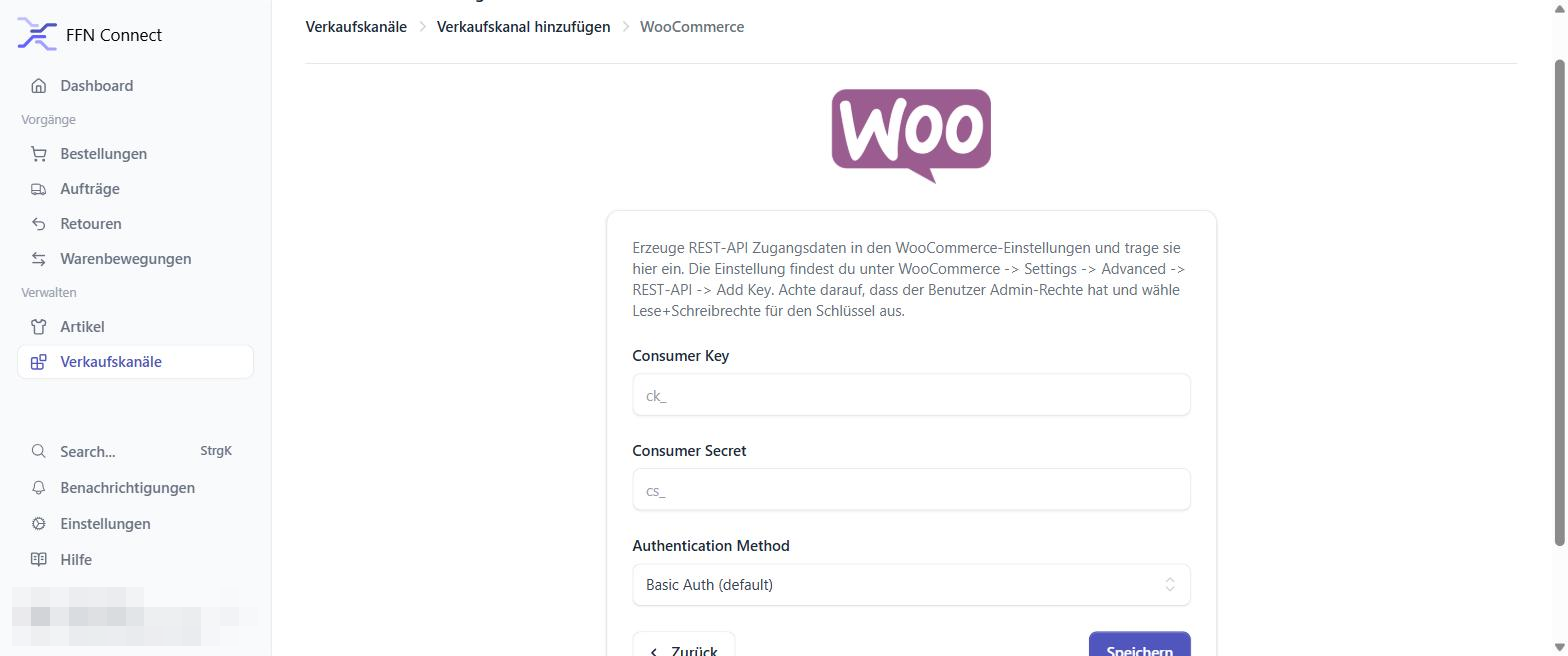
The next screen asks for two REST API credentials — a Consumer Key (ck_…) and a Consumer Secret (cs_…). You create both in your own shop in the next step. Leave the authentication method on Basic Auth (default).
Create the API key in WooCommerce & connect
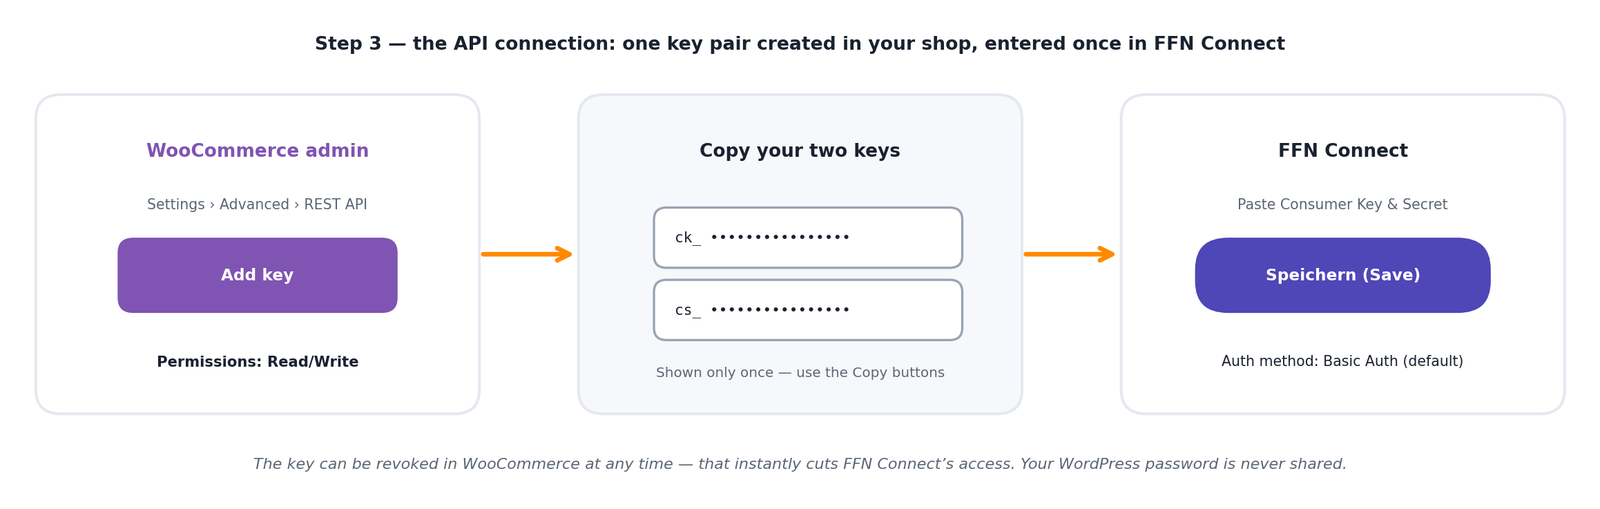
In a second browser tab, open your WordPress admin and go to WooCommerce → Settings → Advanced → REST API, then click “Add key”.
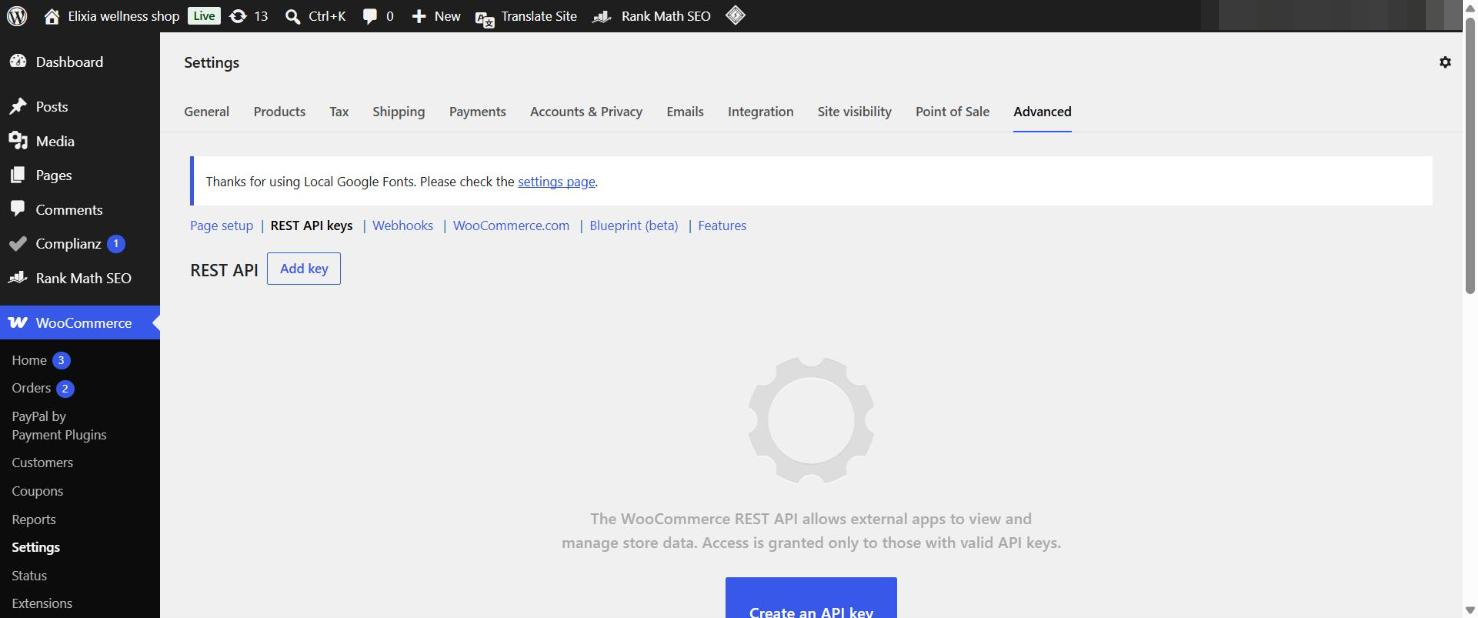
Enter a description (e.g. “FFN Connect”), keep your admin user selected and — important — set Permissions to “Read/Write”. Click Generate API key.
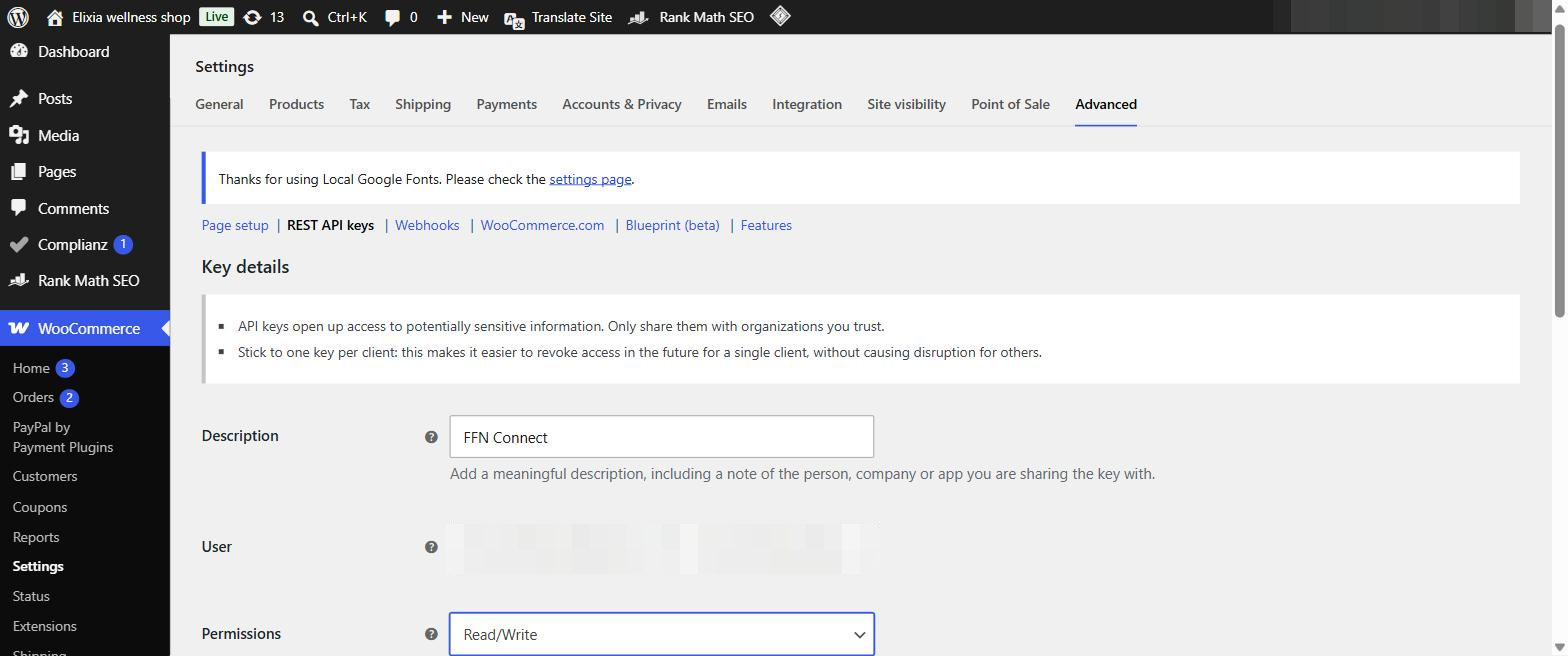
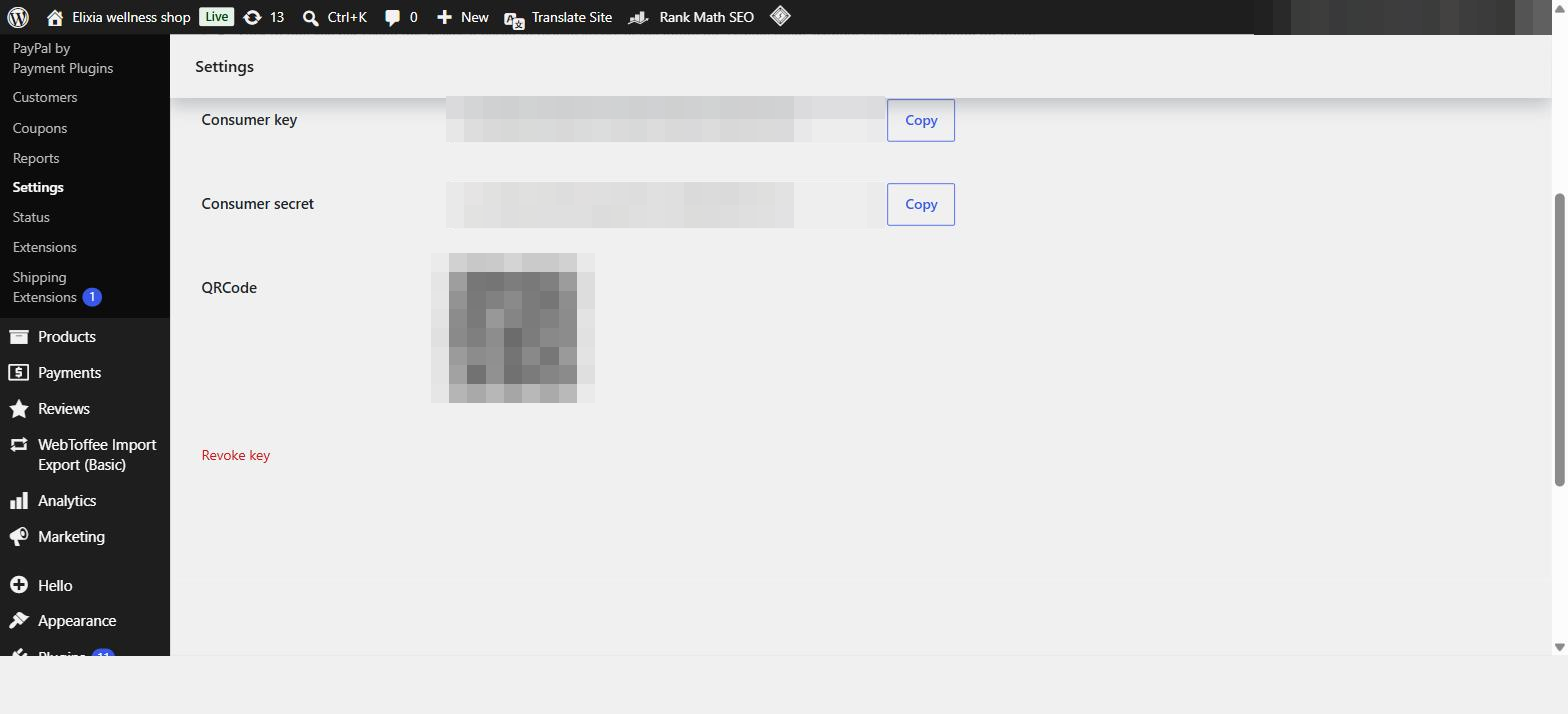
WooCommerce shows your Consumer key and Consumer secret — each with a Copy button. They are shown only once, so keep the tab open. Paste both into FFN Connect and click Speichern (Save) — the connection is tested immediately.
Import your products & set the order start date
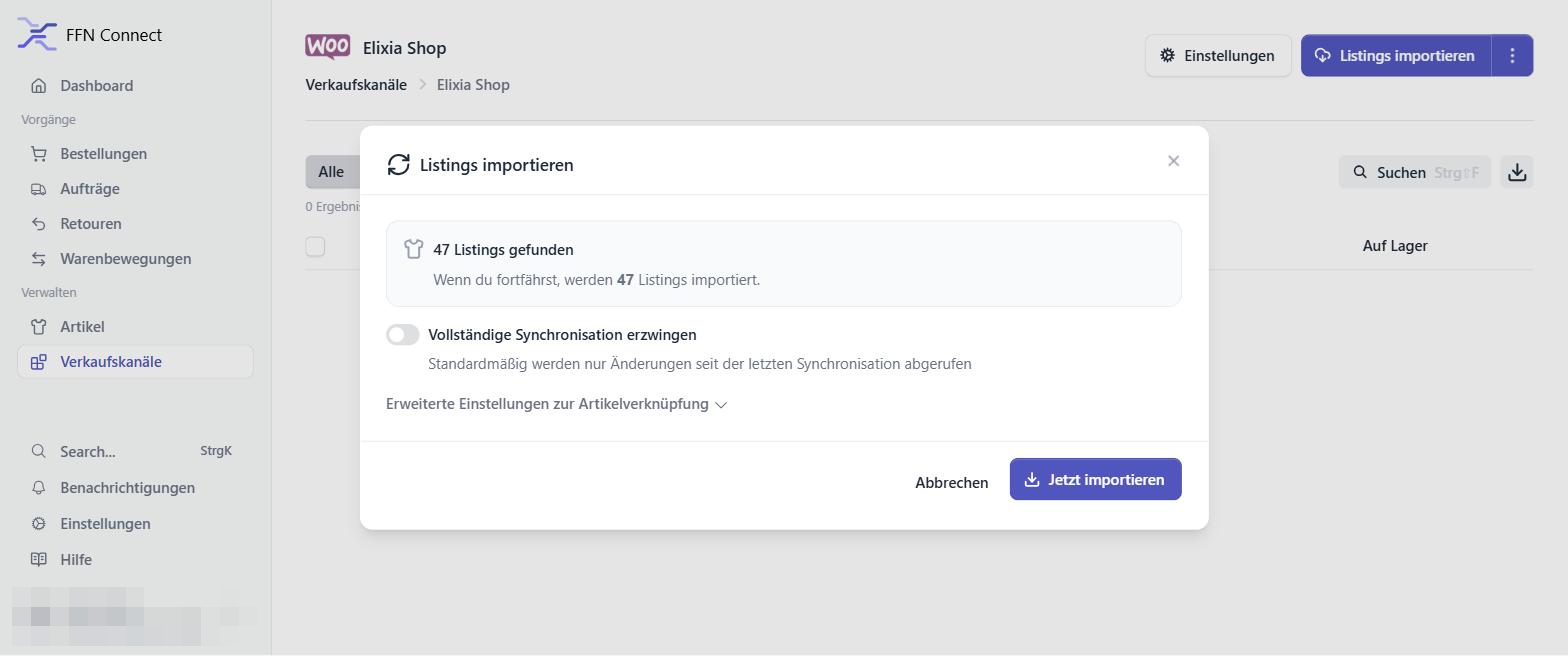
Set the order start date (Startdatum) in the banner at the top of your new channel — orders placed before this date are ignored. Then click “Listings importieren”: FFN Connect counts your products and imports them with name, SKU, image and stock.
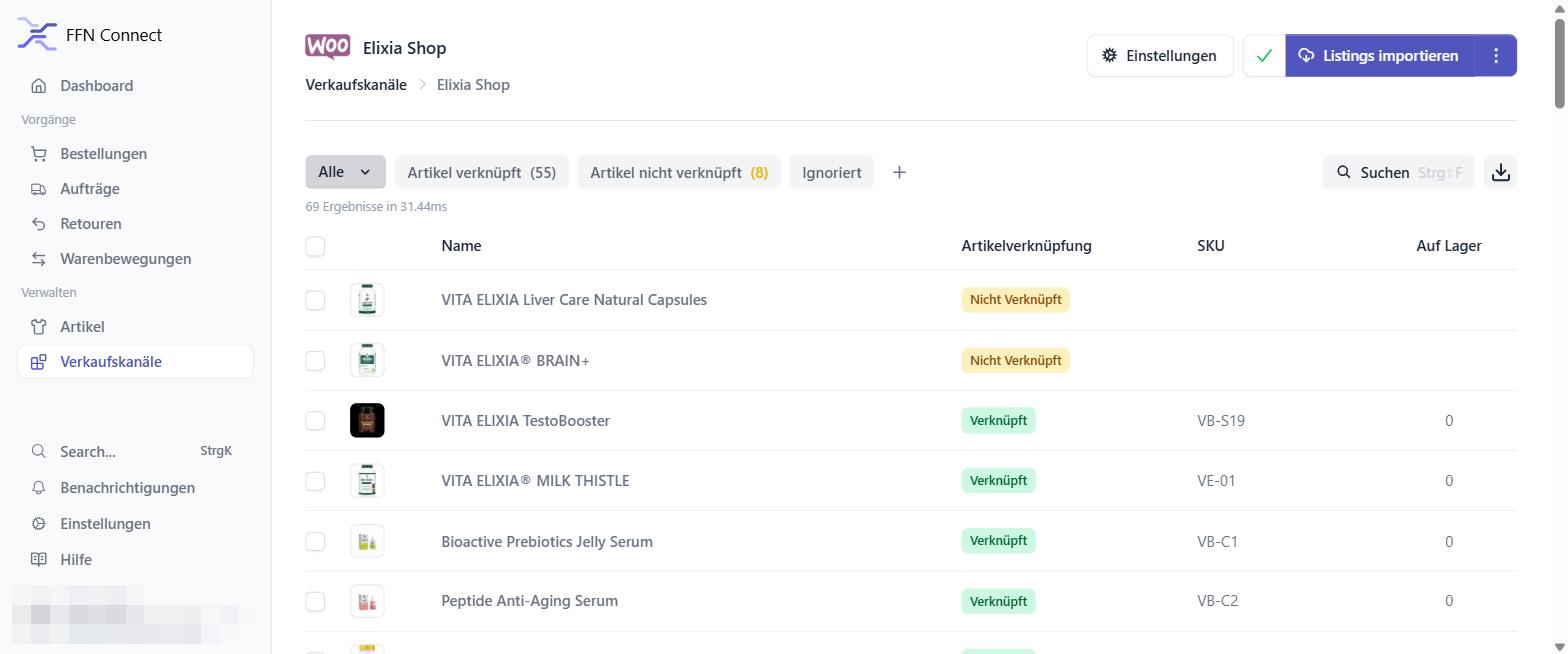
Products with a SKU are linked (Verknüpft) automatically; items without a SKU show Nicht Verknüpft until you add one in WooCommerce and re-import.
Two settings that control your go-live
Your channel works immediately — but these two switches decide when automatic synchronization starts affecting your live shop. Until your goods are stored at StartFill, keep both off.
Stock transfer to WooCommerce
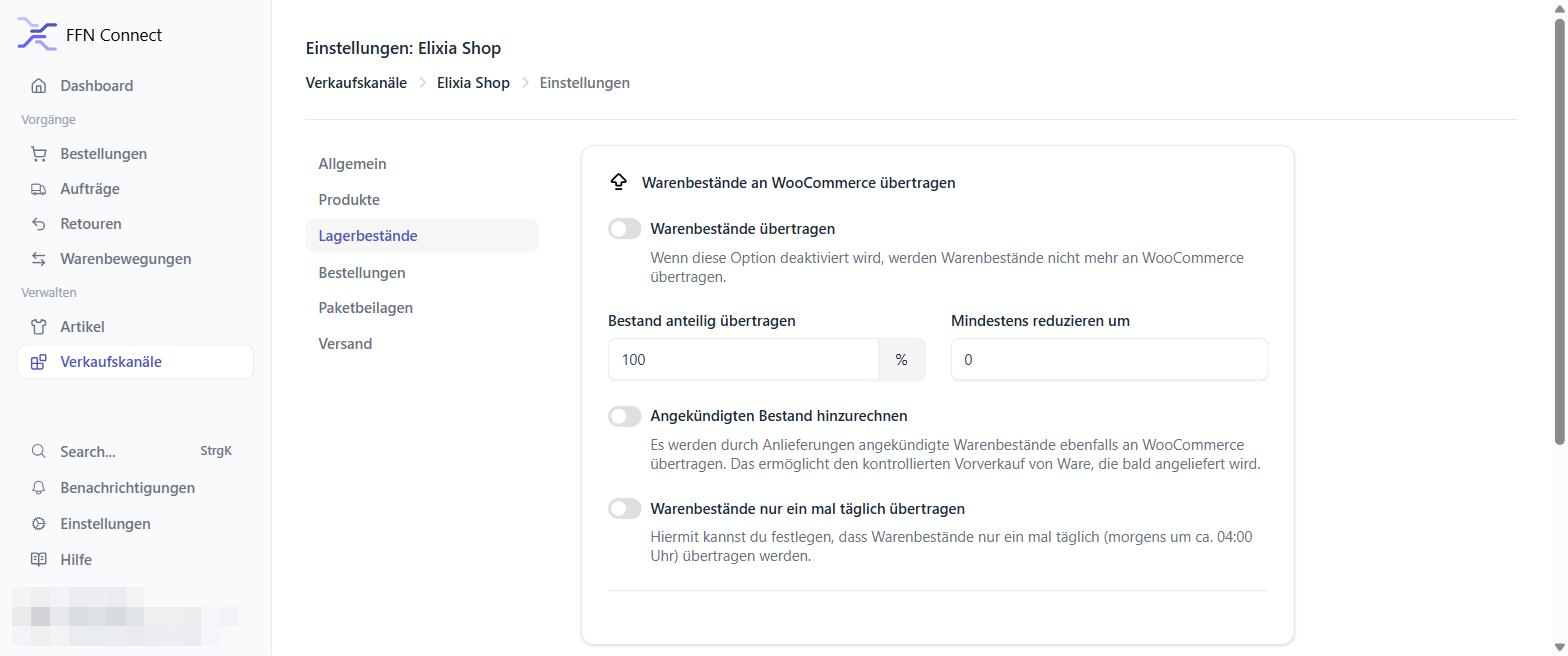
Einstellungen → Lagerbestände · The switch “Warenbestände übertragen” writes warehouse stock levels into your shop. Switch it on only after your inventory is booked in at StartFill — otherwise your shop would show products as out of stock.
Automatic fulfillment
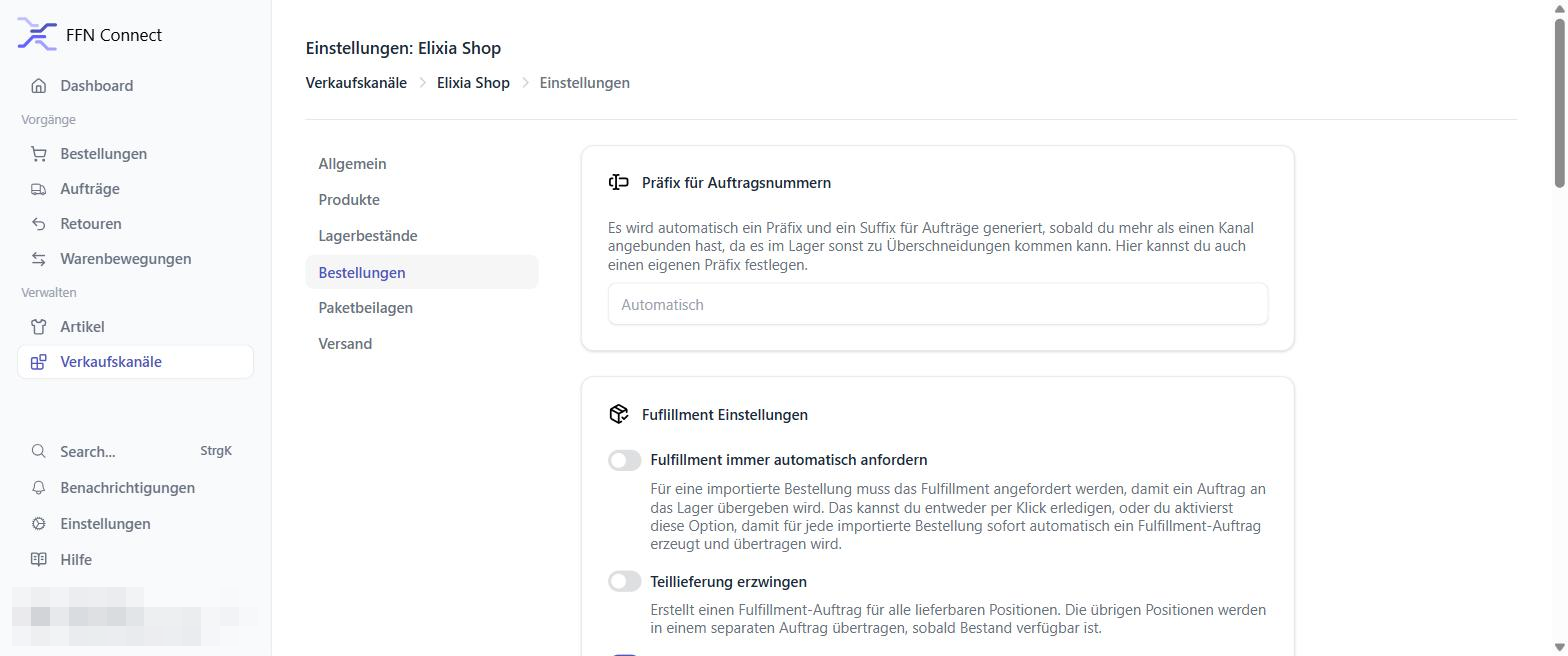
Einstellungen → Bestellungen · The switch “Fulfillment immer automatisch anfordern” forwards every imported order to the warehouse automatically. Keep it off during onboarding and release orders manually with one click; switch it on at go-live.
Plugin or no plugin — your choice
Route B via FFN Connect needs no plugin at all — it uses the REST API built into every WooCommerce shop. Route A uses the free StartFill Connector plugin shown above: one minute to install under Plugins → Add New Plugin → Upload Plugin, maintained by us, removable at any time:
What happens next
Once your channel is connected, tell your StartFill contact. We link your account with our warehouse in the JTL Fulfillment Network, agree the delivery of your goods to Nuremberg, and confirm your go-live date. From then on: a customer buys in your shop → the order arrives at StartFill automatically → we pick, pack and ship → the tracking number is written back to the order → your customer is notified as usual.
WooCommerce connection FAQ
Does FFN Connect get my WordPress password?
Which route should I choose?
Do I need to install anything in my shop?
Why are some products “Nicht Verknüpft” after the import?
Can I connect more than WooCommerce?
What does it cost?
The URL check fails when I add the channel.
Saving the keys fails with an authentication error.
What is the difference between the FFN and FFN Connect?
Do I also need an FFN (Fulfillment Network) account?
Prefer it as a document?
Download the complete guide as a PDF — including all screenshots — to keep or share with your team.
We’ll connect your shop with you
Book a free 15-minute onboarding call and we do the whole setup together via screen share.